Old Indigos

On a sunny day during a bleak week in January, we went for a ride about and took along a quilt. Old Indigos posed beautifully at Auchumpkee Creek Covered Bridge.

You know I love indigo…and I love vintage fabrics…and I love playing in the dyepot.  This project combined all that.

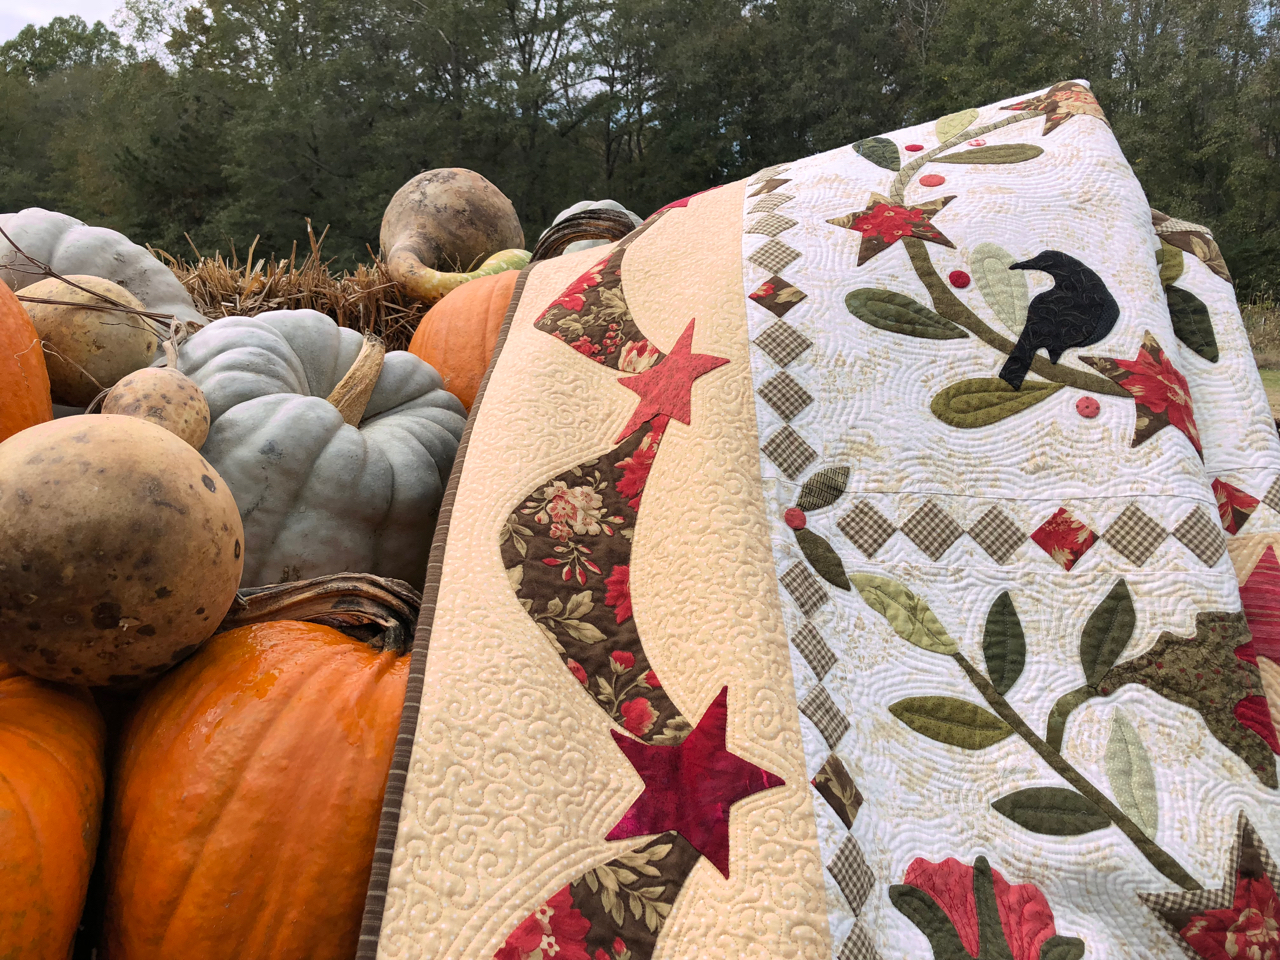
I cut up some old indigo fabrics and appliqued a few flowers.  I used some fabrics I had dipped in the walnut dye bath as backgrounds, and just stitched simple flowers.  

Since all these rectangles were different sizes, assembling them could have been complicated.  To piece them together, I would place them on the design wall, measure carefully, and cut precisely sized bits of khaki linen (my “sashing” fabric of choice for this project), then sew together.  I’ve done that before and it’s not too hard using some gridded paper.  But this time, I used a much simpler process.  I arranged the floral blocks in a pleasing manner, pinned them to the khaki linen, and appliqued those rectangles down, too.

The final measurements for this project are 27” x 31”, perfect for spilling out of a basket or draping across a piece of furniture.

I finished this quilt almost a year ago…but just haven’t been posting on this site. Technical issues have convinced me that it’s time to find another way to share.

I’ll be moving my stories to other formats.  Exactly what form that will take is uncertain:  some Facebook, some Instagram, maybe a book.  

The site and the 250 or so posts I’ve already done will be here on my website until early February, at least.  If there are old stories you want to reread, or to save, now’s the time.

I’m on Facebook as Sandra Hasty Gilreath, on Instagram as Sandy A Beekeepers Daughter. 

Red Hearts on a Quilt

If it’s February, then I need to stitch hearts.  

Somehow, every year, the second page of the calendar sends me to needles and thread with hearts in mind.

This is not the time of year for me to be taking great nature photos to use in my Good Morning Girls text messages.  Yes, I’m still doing that…today is day 665, by my count.  During December, I sent photos of Christmas ornaments, our Santa collection, and amaryllis blooms.  This January had warm days with some still blooming plants in our yard, but things are a bit bleak outdoors now.  A few daffodils are up, but I needed a photo scheme for February.

I’ve wanted to learn more about photographing indoor vignettes…some “sewing still lifes”, I guess you could call them.  So yesterday, I pulled some hearts out to shoot.  I found some jewelry, some buttons, and some fabric hearts I had made.

As I played with the red hearts and the companion fabrics I pulled to use as background, I began a plan for a heart quilt.  

I made a blue one a few years ago, Loving Blues , by stitching hearts on blocks, then assembling them.  

This toile heart is posing on the linen tablecloth I plan to use as my background fabric. See the red border already in place?

This time, my plan is to start with a linen tablecloth from Europe. It has a red border woven in, so that’s convenient…and I won’t have to assemble blocks when I’m done with the hearts. 

I’m planning some appliqué, some embroidery, and some who-knows-what for the hearts. I’ll use many of my vintage fabrics, but I have some nice commercial prints that I’ll likely include. I’m thinking one heart per day in February…but these plans may change.  They often do.  I won’t bore you every day, but I will keep you posted.

And I’ve begun with a heart made from my sister’s red and pink toile drapes that she moved with her from house to house over some 40 years.

I suspended this favorite February pendant of mine over the back of a quilt with red in it. I’m liking this kind of play with the camera.

Shade Tree Mechanics

Life imitates art.

On a recent adventure to a pottery festival, I saw this beautiful 1953 Chevrolet truck.  It was a glorious blue, beautifully restored, and photogenic from all angles.  But my favorite angle was this one because it mimicked the truck I put on a quilt a few years ago.


In 2015, when pondering a design for a raffle quilt for my husband’s local Vintage Chevrolet Club chapter, I decided to create a scene where men might tinker on their machines. I love including trees on quilts, so the title was easy 

The quilt measures 44” x 70“ and is a combination of needleturn appliqué, raw-edge appliqué, hand-guided freemotion quilting, trapunto, and printing on fabric.

I drew the design on acetate transparency and using my vintage overhead projector, enlarged the image to fill the background fabric pinned to my design wall.  The same technique was used to draw the freezer paper templates for the tree trunks and the various pieces of the truck.  I used commercial fabric to build the images, working from background to foreground as I attached the pieces.


I posted these photos to Facebook as I worked and it triggered many memories my students in math classrooms in days gone by.


The quilt top on the design wall before quilting began.


Wool batting was layered underneath the Chevrolet emblem on the tailgate, stitched down with water soluble thread.  Then the excess batting was cut away before layering the entire top on a cotton batting.

Freemotion stitching made the layers become one, a quilt.  In addition, that stitching was used to differentiate areas of the dashboard, windshield, and tire tracks on the ground.  Freemotion stitching was used to attach the raw-edged leaves as well. 

A photo of an antique car tag was scaled to fit the license plate space and printed onto fabric.  Blue was chosen for the 1953 model truck because there is such a truck in Jim’s family.  And blue…well, it’s blue.

A bowtie-shaped Chevrolet icon served as the basis for the handwritten label.  Sadly, I don’t seem to have a photo of that.

Note:  One purpose in writing this blog is to record details of quilts I’ve made.  I had written most of these details in a draft a couple of years ago, but the photo of a real truck like the one I fabricated spurred the post to publication.  As I read the details I had written, I was reminded how important it is to write things down.  I had forgotten the details of the wool batting layer, raw edged leaves, and thread choices.  

Especially since the quilt is no longer in my possession, the written description of the process is more valuable in case I want to do something similar again.

Another note: Many of these photos were made with an older iPhone and poor lighting conditions.  Reducing them to post online makes for even poorer quality, but clicking on the image to enlarge it may reveal some details you miss in the original.

Blue and White and Red

Quick, answer this question:  “What is Sandy’s favorite color?” 

That line brought a big chuckle when I recently asked it at a presentation I was giving.

It’s a little obvious when my work is collected together.


But sometimes I like to add a bit of red and white to the blue, as I did in this piece that’s next on my list of “ready to quilt.”  

I’ve mentioned before that I like to work seasonally.  So a small project I made this year as July 4 approached was this one called Stars in Bloom.  The pattern came from Blackbird Designs, and I interpreted it in cotton and wool. 

The rich red flower petals are various reds from my wool stash, the most prominent being from that red cashmere coat I bought a few years ago.  The vines and leaves and blue stars are cotton fabrics.


I certainly want the quilt label to be unique.  It’s important to include a label identifying the quilt title, the maker, the date.  A simple rectangular piece of cloth containing this information is better than nothing, but since I began quiltmaking, I’ve enjoyed including elements of the quilt’s design in the label.

Ollie Jane’s Flower Garden has a lily similar to the one on the front of the quilt as its label.  Walker’s Pasture has a miniature photo of the front of the quilt on the label.  Mom and Apple Pie’s label features a flag (an appliqué element from the front – and the label you see at the right).

That said, I may have gone a bit overboard in this small piece.  The combination of hearts and stars on the front led me to include a heart and a star.  It took a big star (well, big relevant to the size of the quilt) to contain the title and my name.  Then an even bigger heart was needed to surround the star. Above, the view of the backside.  Do you think the label is visible?

As has become my custom, I embraced the raw edge on this label.  The star was machine stitched to the heart, then the heart was attached using the “glue stitch” I learned from Jude Hill, hand stitching the label through the quilt back and batting.  As time goes on, the raw edges will fray more, adding to the charm of the back.  Or to the tattered look, depending on your perspective.

More about Stars in Bloom:  This piece finishes at 12” x 17”.  The appliqué is a combination of wool and cotton.  The cotton pieces are hand stitched needle-turn appliqué.  Some hearts are made of felted wool and stitched down with a whip stitch, again by hand.  The quilting is free-motion machine stitching (incorporating some hearts in the design) using silk thread on top and cotton thread in the bobbin.

Backsides


I like backsides.  When I’m doing street photography, I often focus on images of people from the rear.  Maybe that’s because I think the result is more likely to convey a universal truth than if the face is there; identifying the individual as, well, an individual.


With quilts, too, I like the backsides to be interesting compositions.  The expected traditional way to back a quilt is to use yardage of one fabric.  I admit I do that sometimes.  But most often when I do that, I find the result to be boring to me.

I often piece the backs of my quilts, especially the large ones.  The blue “wonky star” above is on the back of GBI Blues.  I included lots of my favorite blue fabrics that hadn’t found a home on the front.  In 70 and Still Wearing Jeans, I used pieces of fabrics collected for Jim’s quilt where the images were too large to include in the stars on the front.

In Seven Black Birds, I incorporated the discarded half-square triangles created for the sashing in the back.  That quilt hangs on a ladder in the den and more often than not, the “back” side is what is turned out to the viewer.  That’s the quilt here on the hayrack and bicycle.

Sometimes I have fabric that I don’t want to cut up into little pieces for use on the front of the quilt, so I use a whole piece of it as the back of something.  That way I can leave the piece as a whole unit. The toile piece in the photo above is on the back of Blue Tumbling Blocks, a small wall hanging described here.   I recently wrote about Linen Baskets in which I did the same thing with a fabulous Jane Sassaman print.

My most recent piecing effort was inspired by a piece of fabric I’ve had in my stash for many years.  I just didn’t want to cut it up.  So a pattern involving books (paper foundation pieced) seemed perfect for the front of a quilt with the “reading” fabric on the back.  So, it’s true.  I designed a quilt with the back planned first.  Here is a photo of the backing fabric folded on top of the pieced top.  More details and photos will follow when the quilting is done.

Seven Black Birds

Seven Black Birds is a quilt that’s been on an outdoor photo shoot and I promised more details of its story – a few months ago.

Later is better than never, so here it is.

My friend Kathleen and I shared a love of needle turn appliqué and wanted to make a large album style quilt, each using the same pattern, but varying the fabrics.  We chose the Friendship’s Garden pattern by Barb Adams and Alma Allen.

We shared the plan with other guild members and soon had 20 or more members each making her own version of this project.  At one of our guild’s quilt shows, nine completed quilts made from this pattern were hung together so that visitors could see how individuals personalized their own creations from one common pattern.

I kept detailed photos of my work in progress, so I can share some of my design process through the story of this quilt.

I found a toile fabric in soft shades of brown for my background.  The country scenes in the toile seemed to fit the mood of the pattern  and I chose rich reds, greens, and browns for the appliqué.


Before I was done, the primitive birds in the pattern had been replaced with more sophisticated ones, and I put a blackbird in every wreath in the design.  The one with the nest and its contents inspired the title.  I love to watch people try to find all seven birds.

I made all the sashing blocks (half-square triangles) the pattern described, but when I put them on the design wall, they seemed to overpower my appliqué.  In this photo, some of those triangles have been stitched together, others are just clinging to the design wall.

I redesigned the sashing in a few different ways, auditioned those, and chose the “on-point” strips of squares.

seven black birds

The original sashing pieces were added to the back, making that construction more complex than the front.  But I love it!  This quilt is often displayed on a ladder in the den, and the back is the side turned “out” as much as the front.  The photo above shows the entire back of the quilt as it was hanging at the Ga National Fair.

I quilted the big assembly (it finished at 84″ square) on my faithful Bernina home machine.  Using a 50-weight, two-ply cotton thread I danced with my sewing machine. (I’ve written many posts describing my free motion quilting technique, and if you put that phrase in the search box on the right side of this page, you will find many references.  Perhaps the  process has been described in the most detail here.)

This quilt was finished in 2009.  The photos are from several cameras, some indoors, some out.  That’s why the colors seem so different.  The earlier post with photos at The Farm House Restaurant is here.

GBI Blues

One of the sites on a must-see list for visitors to Macon, GA, is the Hay House, an antebellum mansion now maintained for tours and special events.  Jim and I chose this site for a recent visit, taking my GBI Blues quilt along for a photoshoot.

GBI (Gee’s Bend Inspired) Blues represents everything I know that’s fun about quilting.  I started with a sunprinted image I had made, surrounded it with log-cabin-style piecing of some of my favorite fabrics, used no rulers or pins, and just sewed!  And the blues part is no surprise to regular readers.

Improvisational piecing is a love of mine.  It’s done well by many quilters and I admire so many pieces created that way.  But there’s a fine line between appealing quilts that have been pieced improvisationally and what I consider a big ‘ole mess.

The Gee’s Bend quilts are an art form all their own.  In Gee’s Bend, an isolated community in Alabama, descendants of slaves made quilts in anonymity for generations.  With limited resources, they stitched any fabric they could get, using no rulers or patterns.  In the 1990’s, an art collector “discovered” their creations.  He brought some of the women and their work to the attention of the art world.  Just google Gee’s Bend quilts and you can spend the day discovering these magnificent pieces of cloth.

I had a friend who had taken a class from one of the Pettway women from Gee’s Bend.  Her summary of the technique was, “don’t measure, don’t worry about cutting straight, just sew one piece of fabric to the next.” So, that’s what I did!

I followed the example of the women of Gee’s Bend, using fabrics from clothes Jim and I had worn, not necessarily quilting cotton.  There’s a shirt made from ticking in there.  When my friend Marie, a lacemaker, saw that I had left the pocket intact, she contributed a bit of lace to tuck inside.  Borders of my beloved Cherrywood blues, along with a strip of triangles using indigo fabrics and a mint green solid, added to the mix.

With no measuring, and no finished size in mind, the top was done when it was done.  It turned out to be a perfect lap size quilt, measuring 41” x 54”.  I pieced the back, too, using a Wonky Star (I need to write about that technique – haven’t done that yet) as the center, and again pulling some of my favorite blues together.

When it came time for the quilting, I continued the theme of “this is for FUN,” playing with all kinds of designs and threads.  I added french knots to the Queen Anne’s Lace at the end because it seemed that it still needed something.

I have a self-imposed rule of keeping blog posts reasonable in length.  But, do use your search engine to see more of the Hay House and Gee’s Bend quilts when you have time.  Both are well documented online and worth your time!

Some photos are ones I took.  Some are Jim’s with his amazing digital darkroom skills.  I think you know which ones are whose.  The only full view I seem to find is this shot at the Ga National Fair.

70 and Still Wearing Jeans


The world’s greatest husband had a birthday.  To celebrate this milestone, I completed a project for him that I had started several years ago.  Yes, it was a project in progress for a while.

I had collected some novelty fabrics and made 9” Ohio Star blocks.  The working title for this project was Things Jim Likes.  Construction stalled when there were some categories that had to be included but were difficult to find.  Fabric with cameras, birds, maps, were some of the most elusive.  I put everything in a box and put it on a shelf until I could collect more fabrics.  By everything, I mean a diagram of the quilt I had designed in EQ7, notes to myself about the possible sashing and setting triangle fabrics, and a list of themes I had and wanted to add.

When I would find fabrics that were appropriate, I added them to the box, and time marched on.


As this birthday approached, I decided that this would be his “three score and ten” gift .  Yes, he walked in the sewing room several times while the blocks were on the design wall.  And, no, he didn’t realize what was there.  I worked as quickly as I could with them on the wall, and I lied a bit (ok, a lot) about what I was doing upstairs in the weeks before Christmas.  (His birthday is December 26 – the design wall photo was taken Sept 23.)

Once assembled, I knew I couldn’t hide it long enough to quilt it myself.  And, it’s big and would take me a long time.  So Dewey Godwin became my partner in secrecy and did the quilting in record time.  Knowing the theme and seeing the trains, Dewey incorporated a railroad track into the border.  Perfect!

While I was working on this, Jim was playing Amanda by Waylon Jennings with a line  “finally made 40 and still wearing jeans.”  There’s where the title came from.  Not 40, but still wearing jeans.


My partner, my assistant, my musician, my photographer, my soulmate now has a new quilt of his own.  And, just in time for the coldest weather in a very long time.  It works at nap time in front of the tv.


Some of the things represented are cameras, lighthouses, scientific instruments, football, windmills, Christmas lights, birds, travel, the great outdoors, banjos, guitars, railroads, geology, the US Army, and even  sharks (those represent the years he taught Oceanography and dissected sharks in his lab, gaining notoriety for the smelliest classroom at school).

The patchwork back is made of fabrics whose motifs wouldn’t fit in the star design, but fit the theme.


For email subscribers, here is a photo of the whole quilt.  It measures 65″ x 80″ .  For more detail, go to the website and click on any photo to enlarge.

Christmas Quilts

I love to stitch with the colors of the season.  I know professional artists have to work ahead of the season, getting seasonal prints, cards, books ready during the summer for Christmas, working on Easter themes during snowstorms.  Not me.

I love to sew on pumpkin colored fabrics in the fall, pastels in the Spring, and give me some red and green to stitch while the tree is up.

Right now, I’m stitching on a project called Mistletoe and Holly (that’s the name given to it by the designers, Barb Adams and Alma Allen – and my working title now.  But as the stitching goes on and the design evolves within my life, that name is subject to change).  This is a design I’ve loved for years.

Here is a photo of their finished product. This Christmas season finds me stitching on lots of bindings, finishing some projects for gifts, some for our guild’s upcoming quilt show.  But I had to start a red and green project or the season wouldn’t feel right to me.

Earlier in December, I stitched this wool appliqué piece from a block-of-the-month from Maggie Bonanomi.  I believe this project will be in her book coming out in 2018.


My quilt ladder shows evidence of my fascination with red and green.  In the center is Five Seasons in Bonaire folded with the Christmas season showing.  The top and bottom are Tree Farm of Lorane and Small Tree Farm. These are two sizes of a quilt I designed and made for my daughter’s family a few years ago.  Friends saw it, loved the simple technique, and patterns were born.

Pomegranates and Poinsettias is in the dining room, Miss Lily’s Baskets are in a basket, and a red and green Irish Chain I made for a challenge one year (but did not enter it, I liked another project better for the competition) are around, too.  Detailed descriptions of these projects in earlier posts are here and here.


Above the playhouse hutch, a Santa marches through the woods (based on a design by Jan Patek).  Just as I finished this piece a couple of years ago (needed something seasonal to fit the space), I found the wooden Santa you see on the top shelf marching along in an antique store.  Serendipity!  Oh,  we do know how to spell Noel in our house, but when I bought these blocks in the 1980’s, Jim said to the clerk, “Do you think I should be worried?  I don’t know anyone named Leon.  Why do you think my wife is buying this?”  Her laughter still rings in our ears.  So as a tribute to that memory, we sometimes display the blocks that way.  I forgot to move them when I took the photo.

If history repeats itself, the Mistletoe and Holly thing will be part of next year’s display.  I have another couple of ideas in my brain, too.  But the ideas sometimes flow faster than these fingers can stitch, so only time will tell how much gets done.

Kaffe visits FDR

Look – it’s a president with one of my quilts!  Not the current president, but a president with ties to Georgia. The statue is in Franklin D. Roosevelt State Park, at Dowdell’s Knob, near Pine Mountain.  We had this quilt along with us and I thought he might be a bit chilly.

Following the photographic lead of Kaffe Kassett and Bruce Lundstrom, I decided to take a quilt on a day trip.  This bright fall day seemed a good time to bring Kaffe’s Walk Through the Woods.  Kaffe Fassett is a California-born artist who has lived in England for the last 50 years or so designing knitting and needlepoint designs.  Known for his bold use of color, Kaffe has added patchwork to his textile repertoire, designing vibrant quilting fabrics and using them in simple patterns.  His books on quilting are fabulous photographic journals.  He takes a collection of quilts to exotic locations and stages photos with extraordinary scenes.  Bruce Lundstrom is the photographer mentioned in my latest post here.

Kaffe’s Walk Through the Woods is made from one of Kaffe’s patterns that I began while taking a class from him in 2009.  The pattern is Diagonal Madness and is the result of cutting lots and lots of squares in two sizes and arranging them on a design wall to create patterns in horizontal, vertical, and diagonal rows.

My quilting sister Tess and I shared a work table that day and boldly chose to ignore directions. Here is  Tess beside her rows of squares.


I thought my work was destined for the trash bin until Kaffe himself gave his critique and elaborated on the smokey, ethereal quality of my color choices.  He remarked that he felt like he was walking through the woods with the leaves shimmering on the trees.  So I had a title and reason to finish it – if Kaffe himself liked it, it was a keeper!   But not right away, of course.

The pieces stayed rolled up in the flannel design “wall” we had used for quite a while.  In 2012, I stitched the pieces together and had one of my longarm quilting friends, Kathy Darley, work her magic on the quilting.  Just look at her feathers in the closeup – Wow! Click on this, or any other photo, to enlarge and examine details.

On this fall day, FDR enjoyed the quilt, too.  At least one park visitor took a photo of a crazy lady warming a statue.  I’d love to hear the stories the lady with the camera had to tell friends about our encounter.

The finished quilt measures 56” x 76”.

You can google Kaffe Fassett and “images” and spend the day being mesmerized and inspired by color.  This link takes you to a page focusing on his patchwork, fabrics, and books: http://www.gloriouscolor.com.  More info including videos are here.