 I’ve written before about how stitching soothes my soul. That happens when I’m in front of the tv and multitasking, when I’m visiting with family and friends and my hands are busy, or sometimes when riding in the car. Those are often the times when my hand stitching gets done.
I realize I need to add some opportunity to quietly do some hand stitching when I’m alone. Watching Jude Hill’s videos remind me of how studying the texture formed by stitch gives way to thoughts about light and shadow, contrasting textures, symbolic meaning of weave and stitch, even relationships between people. Though I’m not sure my thoughts run as deep as do hers, I know that mindful stitching leads to deeper appreciation of everything.
 As I watched her video where Jude is adding white hearts to a heavily stitched white nine-patch and emphasizing the touch points of the hearts with red thread, she notices that they remind her of a scar. Her perception always gives me pause, and this struck me deeply.
 I can’t explain why, but I had a flashback to my life working with teachers. One of my colleagues heard a teacher say, “we like this book because we can go in the classroom and teach without having to think about it.” Harriet said to me, “I don’t want teachers who don’t think about what they are teaching.” Indeed.
 Sometimes I sew without thinking about sewing. And, that is relaxing to me, to be sure. The rhythmic pulling of thread through cloth allows my mind to be somewhere else, planning something. But Jude’s symbology in her work, her soul searching thoughts remind me to pursue even more depth in my stitching stories. She reminds me that only when we share the stories behind our work, the symbology we’ve included, the strategies we’ve used, do others really appreciate our art. I admit if I had seen the white hearts on white stitching, I might not have noticed the red thread, and if I had, I might not have made the “scar” connection.
A needle and thread are how I’m stitching myself to the universe these days, so I don’t want it to be shallow. With the recent art quilts I’ve been making, I try to ensure that the viewer knows the story behind the photo or appreciates the handwork in a vintage remnant. I hope that seeing the connection between my work and some element of the past will cause one to think of their own family’s past generations and find the stories that are there.
Another word on Jude Hill and her influence on me. I found her online a few years ago and realized she was offering some online courses. The latest series was already underway and i had missed it. I resolved right then to get in the next one. But then she opened up her vast base of videos and audios for free. You are free to watch them and make a donation or not (I have). But I found a quote from her in one of them that resonates with me. She was responding to a comment from someone who had warned her, “you share too much of your process. Protect your art.”…
Jude’s response: “And, by the way, just to be clear, sharing IS my art. And in case you haven’t noticed, I am out singing in it.” Sept 10, 2015
Wow. I have noticed. And, I am amazed by it.
You can learn more about Jude Hill and her work at http://spiritcloth.typepad.com.
My earlier posts with references to her work are here, and here, and here.
 Photos: The photos of the “beast” piece is one I was fortunate enough to buy from Jude. When her pieces go on sale, you have to be sitting at the computer watching (or lucky) because they sell quickly. I love having this piece to examine. Seeing her stitches and handling her work informed me of her techniques so much that I began to consider selling some of my own work. If my work could help another quilt maker with a particular technique, or if the final result gave a viewer satisfaction, than I would be willing to share it that way. You see images of the whole piece, approximately 6” x 9”, and closeups of the front and back.
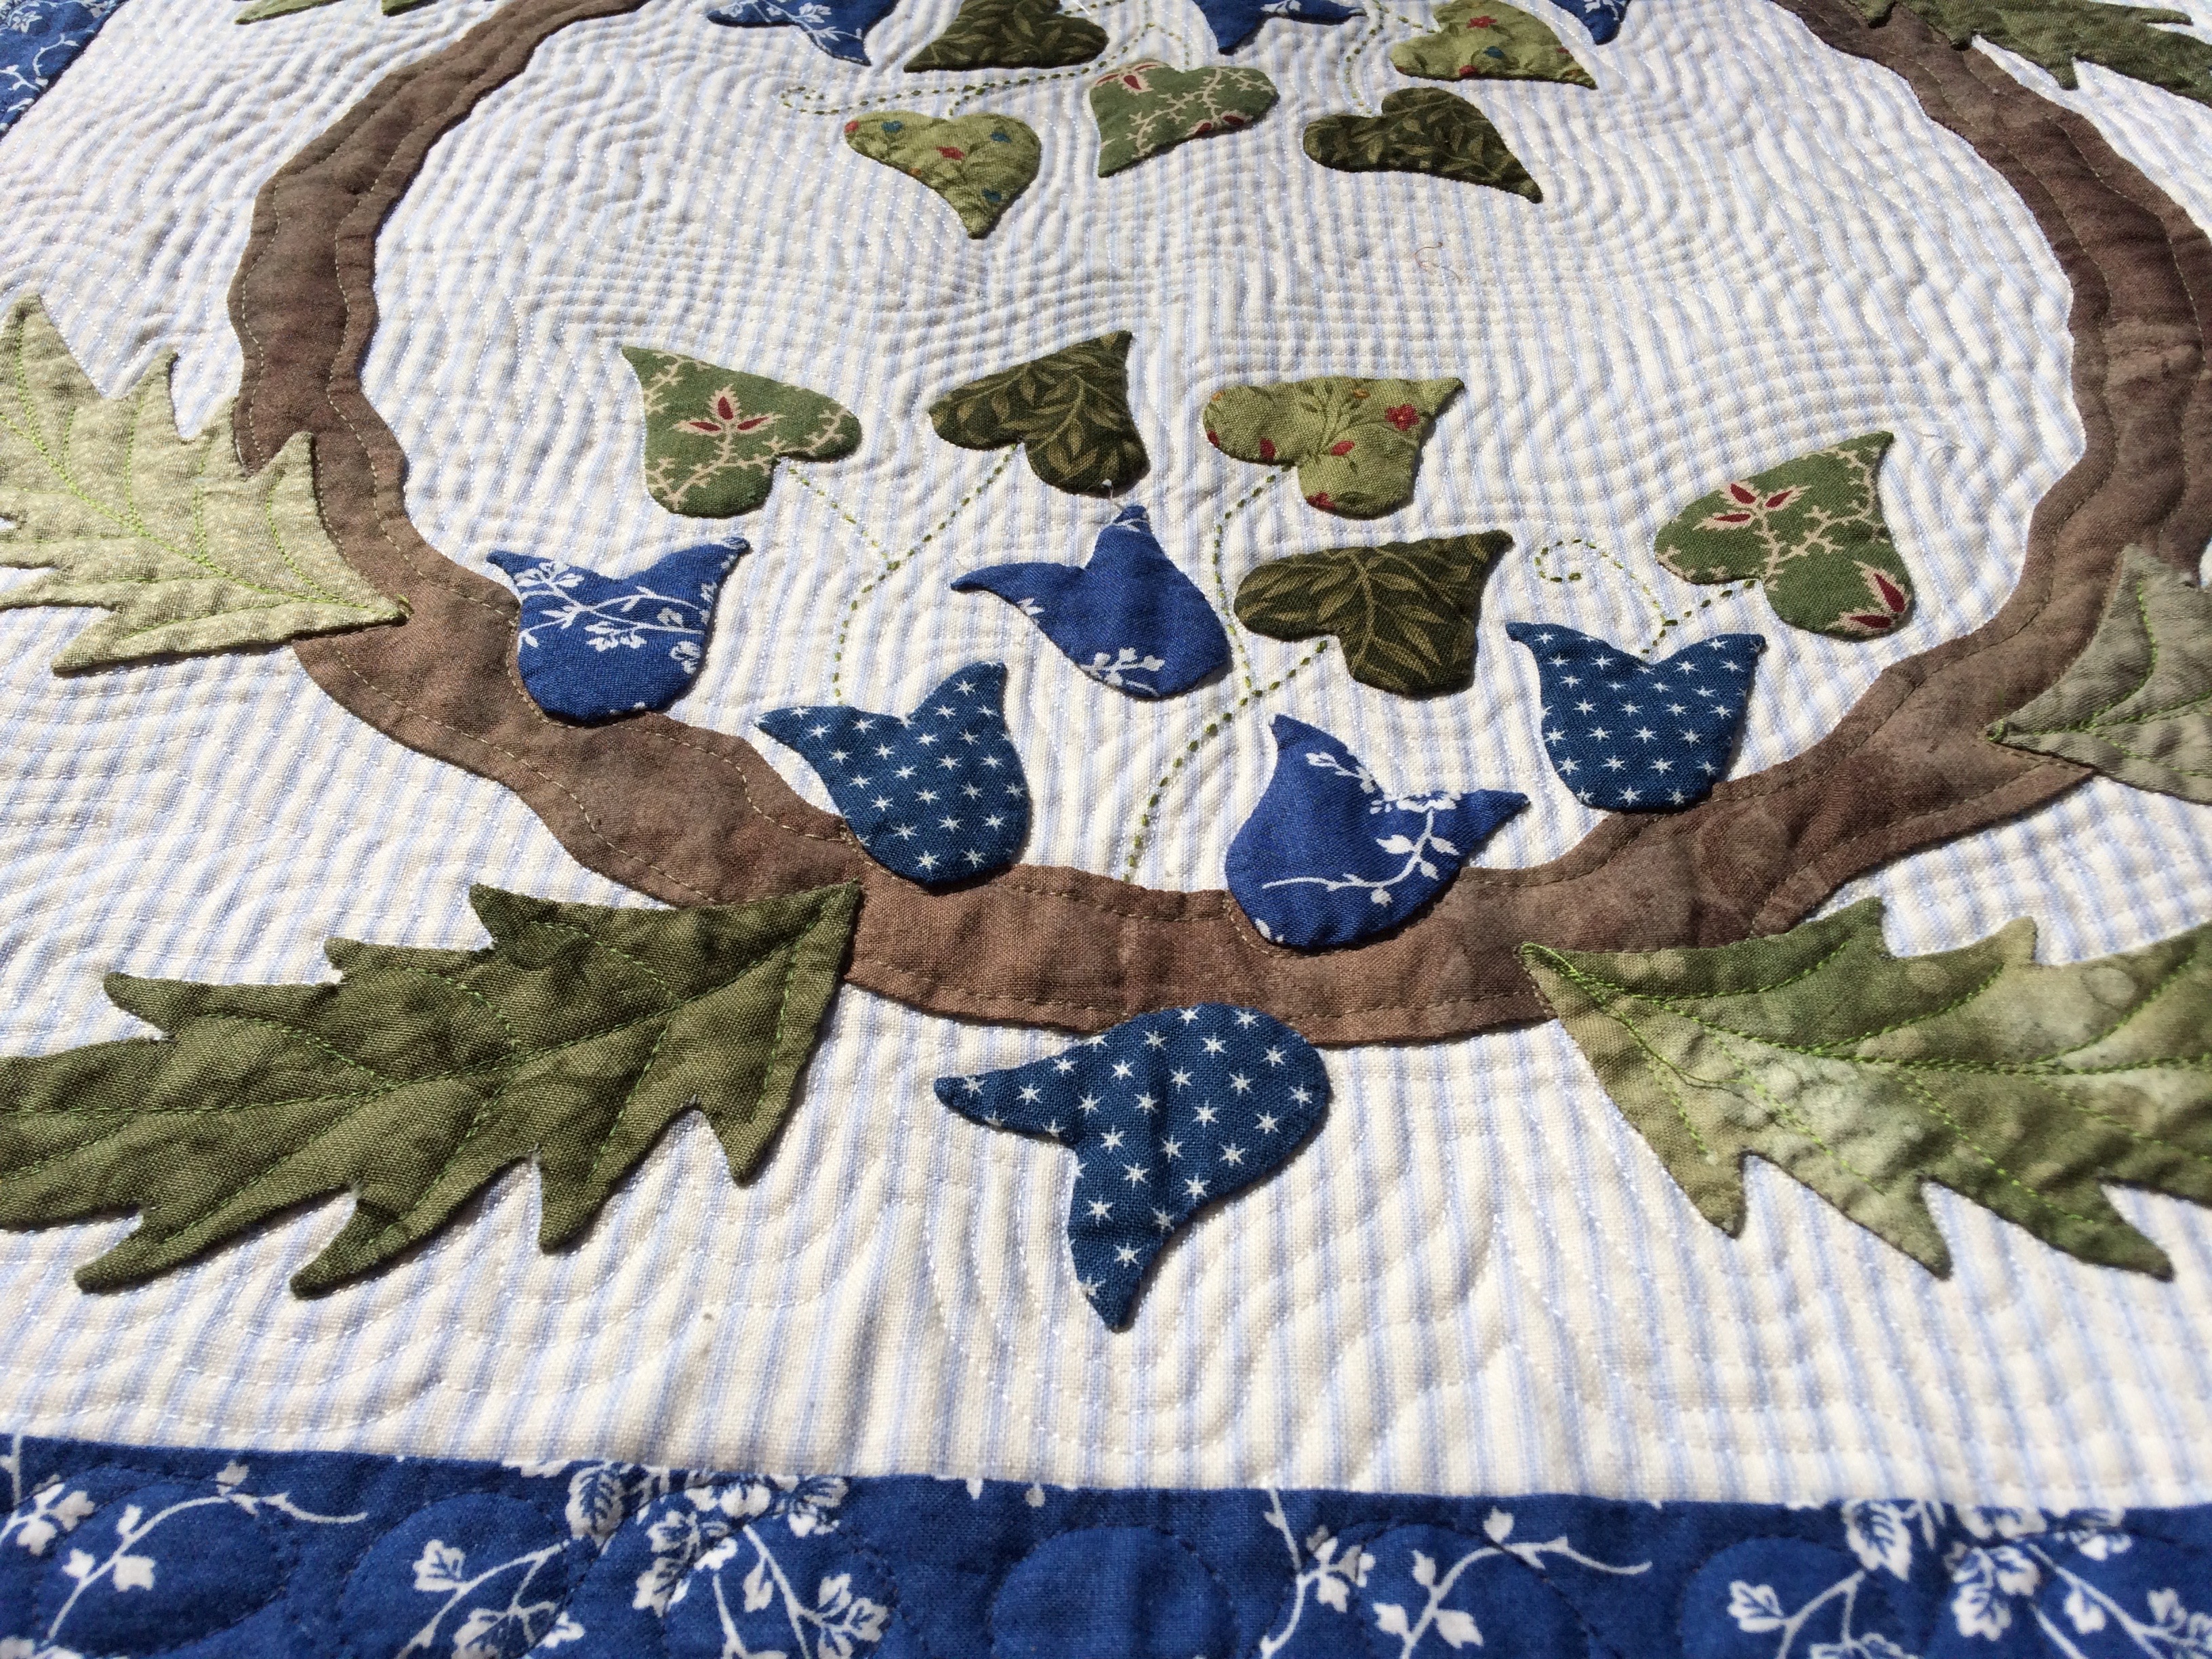
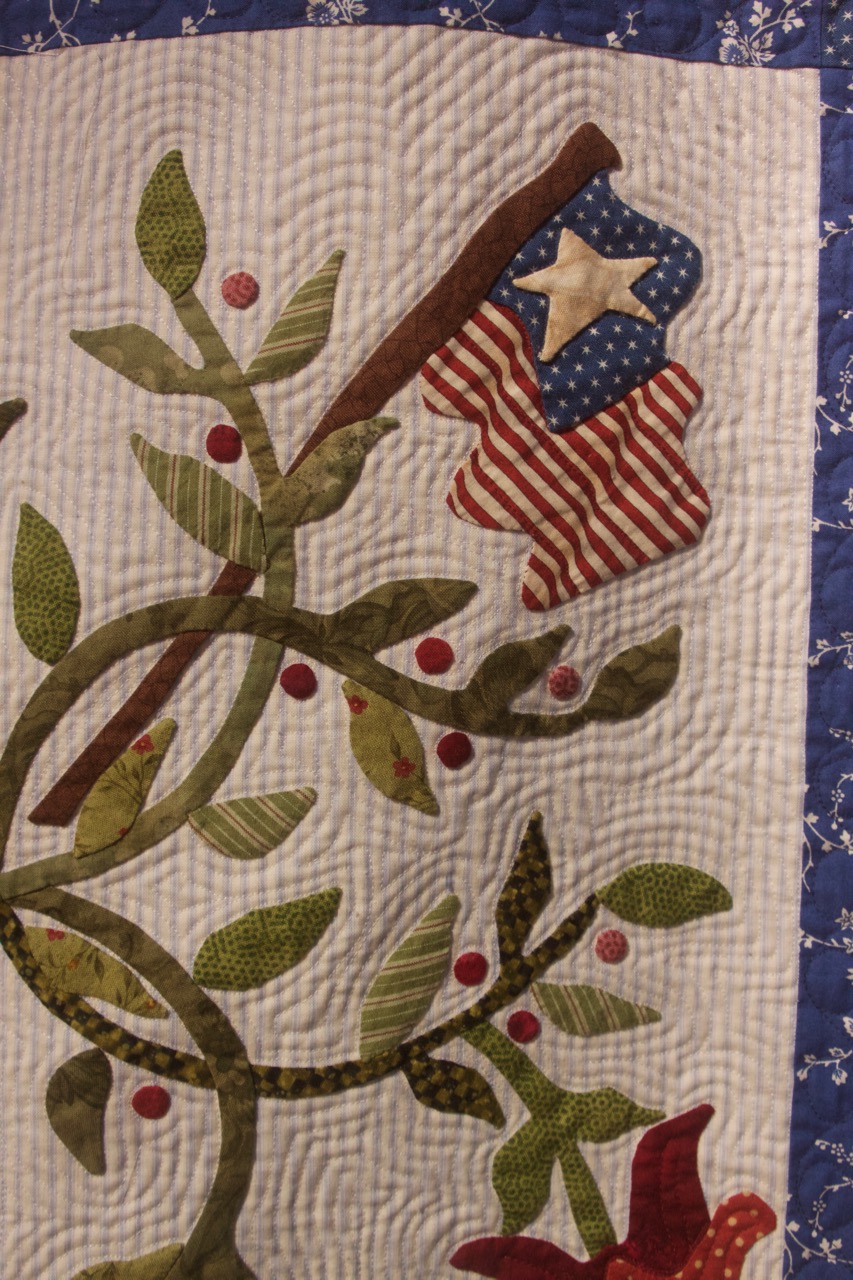
 The photos of the blue hearts are my work. I made that piece after watching Jude’s Whispering Hearts series of posts on her Feel Free site. That piece may become part of something else or be finished as is. That’s one thing Jude and I have in common. A work may be started, then incubate a while as ideas mature, then later become complete as it is or as part of something else.
This post is published with permission from Jude Hill.


 It’s October, cool, and time to think about glorious leaves falling. I love to see the leaves drift down from the trees, and I love the colors as the chlorophyll breaks down. The shades of red and yellow taking over from the green are spellbinding. And orange is there, too.
 Orange is not my favorite color in decorating or in quilts. But this time of year, I incorporate it into our lives. Our guild’s designated Challenge Queen, Tess, loves to require a bit of orange in her rules; so I’m learning to incorporate it without screaming. And, if the theme is fall, I get to use pumpkins, which I love. I love their shapes, texture, and color. The pillow here is wool appliqué. The pumpkin and leaves wools were purchased hand dyes, the background is a recycled wool skirt, felted and reused.
 Two recent projects include pumpkins. This 5” x 7” framed piece is a pumpkin appliquéd onto a fabric replica of an old sampler in colors of autumn.
 Another pumpkin is hand appliquéd on an old linen doily with free-motion machine quilting, hand embroidery, and beading. It is attached to a remnant of an old quilt and measures 22” x 17”.
 The middle layer is a found remnant of linen drapery fabric. I just love the grasshopper. You can click on any photo to enlarge it, but this is one you might really want to examine.
 Above is the entire piece.


 Sarah Beth, Sarah Bob, Sarah Frances. Margaret Ann, Lou Emmelyn, Mary Frances; all are common names in the South. And with women, both halves of the double names are used on a daily basis. Shortened forms of Mary Elizabeths I’ve known were Lilly Bet, Mae Liz, and the ever popular Mary Beth. To get the right perspective here, you should read the list aloud, slowly. Very slowly. Put a little twang in there. Now you’ve got it.
 es of popularity. In one generation, almost all the Sadies have died out. Then there is a rash of little Sadies running around. I think that particular name is beautiful, because it is beautiful, and the Sadie (actually in her generation it was Sadie Belle) in my life was a beautiful person. She is the woman pictured at the top of this post. There was a beautiful Cleo in my life, too. But I’m not hoping to see that name resurrected. The same goes for Ena Belle, Maudie Lee, and Mary Etta. Those don’t roll trippingly off the tongue.
 In the South, if a woman doesn’t have a double name already, we make it so by adding Miss or Aunt. Miss Lily, Miss Emily, Aunt Gladys (though no kinship exists) were big in my life. And then I became Miss Sandy.
 Miz Sadie Turns 80 was made for my mother-in-law in 2004. The blocks are the traditional Ohio Star blocks, finished at 9”. Sashing is 1” wide (beginning my insistence that narrow sashing separates, but doesn’t overwhelm the blocks). The overall quilt measures 63” square. It is pictured here hanging at the Georgia National Fair in 2004, one of the first quilt competitions I entered. It won a blue ribbon, and Miz Sadie was so pleased that she asked if she could have the ribbon, too. The quilt hung in her home with ribbon attached, as long as she lived there.
 The label is a