Skinny-Dipping Quilts

mimi's boys skinny dippingChildren are so observant.  They see details that we adults pass right by.

Some of the first quilts I made were for grandsons.  There are now three teenagers, but at the time of the quilt you see pictured at the end of this post, there were two toddlers.  I saw an episode of Simply Quilts in which Judy Martin demonstrated the large block which dominates this quilt.  I had bought some Tom Sawyer themed fabric and companion pieces, and I went to work.

I made the largest block, (24” square, I believe) using two different scenes from the toile print in the center.  One was of the boys fishing, the other of them painting the fence.  I made smaller blocks using the fabrics I had in the collection and coordinates from my stash.  Now that I think about it, I was using my version of improvisational piecing from this beginning.  I laid blocks on my design table (otherwise used for eating dinner; the design wall came much later in my quilting life), measured spaces, and inserted filler pieces or blocks.

Now I sometimes lay out such a design on grid paper, calculating dimensions using the squares, but in 2002, I wasn’t so deliberate.  I gave the two quilts titles based on the toile, “Mimi’s Boys Fishing” and “Mimi’s Boys Working” and presented them as Christmas gifts.

Several years later, one of the grandsons attended a quilt show with me. I’m not affirming or denying if bribery was involved.  I saw a quilt with familiar fabric, and exclaimed, “look, this quilt has fabric like yours.”  I was quickly corrected, “Well, not exactly.  This boy has pants on.”

“Yours aren’t wearing pants?”

“Not the ones going swimming.”

His mother was as surprised as I was.  She hadn’t noticed either.

Back at their house, we all examined the quilt to see that, yes, indeed, the fabric I bought prior to 2002 had skinny-dippers.  I don’t know the manufacturer’s storyline, but I’m guessing someone was offended, and subsequent yardage was more modest.

Yes, I have scraps of the risqué print, even a bit of yardage.  Hmmm, I think there’s a story quilt idea.

Mimi's boys quiltQuilt details:  Finished measurements: 36″ x 50″, batting was probably 80% cotton, 20% polyester, quilting was straight lines with walking foot.

Annie Mae’s Lace

Annie Mae's LaceSome of my quilting sisters think I’ve recently “gone to the dark side.”  Now that I’m taking art classes with artist Mark Ballard and incorporating my drawings onto fabric and into quilts, it seems to them that I’ve left the world of traditional quilting to become an art quilter.

If there is a threshold to cross between those worlds, I don’t see it.  I have recently been experimenting with the above-mentioned technique, crayon rubbings on fabric, watercolor on silk, and using fabrics that are not limited to quilting cottons.  But that’s not new to me.  And traditional quiltmakers have, for centuries, looked for interesting ways to bring images into quilts.

Look at Annie Mae’s Lace, a quilt I made in 2006.  I created blueprint images of Queen Anne’s Lace on pretreated fabric and made a quilt.  This piece measures 40” square, the botanical image is 25” square.  I actually made this quilt to refine the border technique.  I had seen photos of borders with vines with the inside and the outside of the vine being different fabrics, but had not seen any instructions on how to do it.  So, this experimentation worked and I then used that technique on the larger Ollie Jane’s Flower Garden.

I’ve used the same sunprinting technique on several quilts; and on fabrics still in a box waiting to come out and play.  I’ve printed feathers, leaves, scrapbooking stencils, and more.  So far I’ve used two techniques – one dry process and one wet.  Both processes involve spreading the fabric out flat, placing the masking object (leaf, stencil, whatever) on top, securing it so it doesn’t blow away, and exposing it to the sun.  Then, when the “developing” is done, you quickly wash it to stop the action.

I’ll note the obvious here:  this has to be done on a sunny day, and the image is sharper if you expose the fabric while the sun is high in the sky.  I began playing with this technique before I retired.  So, I spent some lunch hours securing big branches and leaves (and Queen Anne’s Lace) to the fabric atop foam board or something firm, waiting 15 minutes, washing it and putting it in the dryer.  Lunch was en route to and from my office, I guess.

The dry process entails purchasing pretreated fabric for sunprinting (also known as cyanotype).  These fabrics have been chemically treated to react to the sun and produce a negative image.  If you are old enough, you’ve seen plenty of blueprints made the same way.  The company from whom I bought my fabric is now known as blueprintsonfabric.comDharma Trading Company also sells some.  Both of these vendors also sell the chemicals to prepare your own fabric.

The wet process involves using some type of paint on fabric which produces a negative image when drying.  It is more labor intensive, but there are more colors available for the final outcome, and it can be applied to a printed fabric to add more interest.  I used SetaColor paints available at any hobby shop.

Note that this quilt is ten years old.  Yikes!  There are lots of videos on youtube showing details of how to make a sunprint if you are interested.

I’ve taught the sunprinting technique to my local guild, and luckily, it was a sunny day and we made some successful prints.  The process is fun, and if the wind blows, the worst that can happen is that you end up with some beautiful blue fabric!

Documenting my quilts and their stories is one of my goals for this online journal.  Slowly, I’m doing that.  But I’m also reminding myself of fun things I’ve neglected for a while.  Excuse me while I go dig through my pile of sunprints to see what I might play with next.

Annie Mae closeupFurther details of this quilt:  This was early in my life as a hand-guided, freemotion machine quilter.  I had previously used matching or transparent thread attempting to make my irregularities less noticeable.  Here, for the first time, I dared to try the continuous curves using a heavier, contrasting thread.  I marked a one-inch grid and used that as a guide.   The border fabrics are batiks, the vine is a quilting-weight cotton cut on the bias,  batting is Dream Cotton request, and threads are cotton.

Annie Mae was the name of the beautiful lady who was my teaching assistant when I taught Head Start at Bruce Elementary in the summer of 1973.  I was 22 years old, knew nothing about little kids, had been trained as a high-school teacher, and was surrounded by five-year-olds.  She was my lifesaver!  So I played with the plant name to give homage to the woman who kept me from exiting the teaching profession.

Playtime

Today’s experiments:watercolor flower on silk

Silk radiance fabric.  Dream Wool batting.  Freeform stitching of a feather and simple flower using Aurafil cotton thread (50 weight/2 ply).  Echoing and background quilting using silk thread (100 weight).  Flower is painted with watercolors, hand embroidery added in the center.

freeform feather on silkFun!

Tidying Up

Kaffe baskets in basketFriends and I were discussing the Tidying Up bestseller at dinner last night.  I’ve not read the entire book, but I have read a lot of it.  First, let me say that this woman’s definition of tidying up is different from mine.  My idea of tidying up means someone is coming over and it’s time to run the sweeper and stash some items in the closet.  (I will admit that I later straighten the closet and periodically purge it of unused items, but not on a rigid schedule and not enough to invite visitors to admire.)

Though I agree that “stuff” can get in the way of living your life, I’m here to tell you that cleaning can do the same thing.  Balance, people, balance.  Don’t be a hoarder, don’t live in squalor.  But, then again, don’t obsess over everything being perfect.

I wonder how many people on their deathbeds wish they had taken one more load of unworn clothing to the Salvation Army.  Can you tell that I spent yesterday cleaning and wished I were sewing?

When it comes to my quilting stash, I do sometimes find the need to straighten it to see what I have.  Sometimes I share remnants with other quilters.  It is fun to see their faces light up when they find a fabric I’ve used in a quilt they like and now they get to play with it, too.

My working style is that I have several quilt projects in progress at one time.  I sometimes get bored with one technique or another, but often the reason is location.  I always need a project that is portable – to stitch while watching tv or sitting on the porch, or recently, while riding in the car.  Once that phase of the stitching is done, that piece might get set aside until I have time to prepare it for the next level.

I do keep the fabrics that I’ve selected for a given project together until it’s completed.  I use baskets to contain them.  Sometimes there are lists in the baskets telling me what is  cut, how many are remaining to be stitched; maybe a sketch of the layout possibilities.  I will confess that there are a couple of projects that I like seeing the blocks in a basket – so I’m not anxious about assembling those at all.  Alma Allen and Barb Adams depict vignettes of such collections in their books and on their website.  They inspire me to enjoy all phases of the quiltmaking experience.

Susan Lenz explains that the beginning phase and the finishing phase of projects are exciting.  But one doesn’t need to be excited all the time.  The stitching phase is relaxing – so psychologically, I’m centering myself with my working style.

I have come to realize that sometimes I slow down on a project before it’s finished, not wanting to finish until another is at its relaxing stage.

Jude Hill says of one of her magic feather posts, “And yet there is still stitching.  Maybe I have slowed down even more.  Just to make it last.”

Oh, yes, I’m in good company if my working style bears any resemblance to Alma Allen, Barb Adams, Susan Lenz, and Jude Hill.  But it may not look tidy.

Embellishing with Paula

no presser footIf I had known old ladies had so much fun, I would have aged faster.

Today was session two with Paula Reid.  We stitched ribbons and beads and baubles.  We used dental floss implements, funky charms, and fancy stitches with specialty threads.  We made new friends and laughed a lot!

I even won a cone of wine thread.  Yes, you read that right, wine.  I told you old ladies had fun!

Not only did we disengage our feed dogs, we removed the presser foot!  Sewing is not for wimps.  But, man is it fun!  I have a new tool in my arsenal.  Now I know more ways to use those beads and baubles and fancy fibers I’ve collected.

Every member of the class was playing with ribbons and threads in a different way.  Taking a class is so inspirational – not only do you have an experienced teacher who shares her knowledge, but other participants spin off in different directions.  Take a class!

Simply Quilts was still on tv when I began quiltmaking in 2001.  I was still working, so I recorded the show every day, then watched it when I got home.  I learned most everything I know about quilting basics that way.  When I heard Paula Reid was coming to town, I knew she quilted on a domestic machine as I do, using what she calls the “fluff and stuff” method.  I also remembered her episode on beading and embellishments where she removed the presser foot.  I felt like I knew her already, because I had watched those SQ episodes over and over.

Online quilting shows still keep me up-to-date with the latest artists breaking the mold, or perfecting the mold, but it’s not the same.  I spend money to subscribe to some of the online shows (thequiltshow.com hosted by Ricky Tims and Alex Anderson is my primary resource).  I watch some youtube videos, too.

I read quilting blogs.  I listen to quilting podcasts. I follow links to other artists’ work from Facebook.  I goggle names of people whose work I see in magazines and online.

But nothing takes the place of on-site, person-to-person contact with an expert.  Thanks, Couture Sewing Center, for bringing Paula.  And, thank you, Paula, for coming to GA, and sampling our grits.  And, thank you, fellow classmates, for a fun two-day sewing experience!

Improving Skills

Sandy & PaulaI always love to take classes.  Yes, I could have enjoyed being a professional student.

I’ve been fortunate to take classes in the past from many well-known experts in the quilting industry; Hollis Chatelain, Sue Spargo, Ricky Tims, Kaffe Fassett, Sally Collins, Karen Stone, and more. And, I’ve attended lectures by others including Lisa Bongean and Diane Gaudynski.

But until today, I had never taken a class on free motion quilting.  I had learned by watching videos and reading and practicing.  And more practicing.

Today I took a free motion feather class from Paula Reid at my favorite quilt shop.  I’ve tried my hand at feathers before, with limited success.  Today’s class was wonderful.  Paula has quilted professionally for many years.  Now she travels the country teaching others how to quilt on their home machines.

The class was structured so that Paula demonstrated a variety of paths and patterns to fill a quilting space with feathers, then gave individual assistance as we stitched along.  The morning was devoted to feather designs marked with stencils, the afternoon all free motion feathers, unmarked.  So liberating!

Sandy's featherThis photo is my unmarked free motion design from this afternoon.  Red Mettler 50 weight cotton thread in the top, Aurafil 50 weight cotton in the bobbin.  Echoing is done with 60 weight Kimono silk thread.

Here are samples of Paula’s work (she gave permission to share).  The green fabric is a silk/cotton blend –gotta get some of that!  The motifs are fabulous!  And, you are seeing the bobbin side of her work!  Amazing talent she has.  I’m so glad she’s in GA sharing her knowledge with us.

Paula's silk samplePaula's green featherPaula's red feather

And, tomorrow…free motion embellishments with beads and ribbons.

Ollie Jane’s Flower Garden

Ollie Jane's Flower Garden
Ollie Jane’s Flower Garden

I recently described this work as “my first major quilt.”  It was completed in 2007, so it doesn’t belong in the catalog of my latest work, but the elements I included in it still appear in many more recent designs.

The quilt was made over a period of six years.  I completed other quilts during that time, but this was an ongoing project.  One of the first piecing techniques that intrigued me was English paper piecing.  I basted the 1” hexagons on freezer paper and had a portable project.  Since I was still working full time, I stitched while riding in the car and on visits with my mother in her assisted living facility, on the porch with her at her nursing home, and in hospital waiting rooms when my sister was ill.

As I was learning more about the world of quilting, I began to think of ways to combine these hexagons with other quilting techniques.  Once I learned needleturn appliqué, I wanted to add some curves to my pieced elements.  I assembled ten of the Grandmother’s Flower Garden units, appliquéd them to a background, and planned to add a vine with leaves in the border.

detail from Ollie Jane's Flower Garden
detail from Ollie Jane’s Flower Garden

I actually made another small quilt to explore the technique of the two-colored border with the vine separating them.  That worked, so I interpreted it large scale.

I wanted a bit more interest in the center of the quilt (well, not really the center…I was already embracing the idea of asymmetrical balance), so I made a bouquet of flowers using some elements of flowers from Barb Adams and Alma Allen’s Quilting in the Garden (a quilt I completed sometime in this process).

detail from Ollie Jane's Flower Garden
detail from Ollie Jane’s Flower Garden

I made my first bow with trapunto here.  I loved the bow.  I still like bows.  Especially plaid bows.  They reveal the folds created when a ribbon is rumpled to tie a knot.

Certainly not the least challenging was the quilting.  Then a beginner, I quilted the hexagons with a continuous curve motif, echoed around the appliqué, used my version of one of Diane Gaudynski’s filler designs in the inner border, and stitched a double grid in the outer border.  The only element of the quilting that was marked was half of the straight lines (they are 1” apart) and then quilted 1/4” away from that using the edge of the free motion foot.  Then, as now, the straight line quilting is the most challenging motif in free motion quilting, but I do still love the effect.

When it was time to give this quilt a title, I enlisted my husband’s input.  He came up with Ollie Jane’s Flower Garden to honor the traditional blocks of hexagons and give tribute to my quilting grandmother, Ollie Jane Hasty.

This quilt has had quite a career appearing in quilt shows and going to lectures with me.  She has earned some ribbons and accolades, but I haven’t retired her.  She hangs in the stairwell of our home, as close to the center of our lives as she can be.

The quilt used all cotton fabrics, some reproduction feed sacks.  Batting is Dream Cotton request.  Quilting thread is DMC machine embroidery cotton 50 weight / 2ply.  Finished dimensions are 58” x 68”.

Treasures from India

Oh, I feel loved!

Indian scarvesEarly this morning I got a text message from someone who loves me.  My son-in-law is literally halfway around the world on a work assignment and sent the photo you see here.  He said, “I saw all this fabric and thought you might want some.  There is wool.  There are wool/silk blends.  There are more.  Tell me what you might like.”

Oh, really?  WOW!

I have no shortage of fabric.  I’ve even been on sensory overload this week seeing fabrics of all descriptions at vendors’ booths at the AQS show in Paducah. I bought a lot that thrilled me and I can’t wait to play with it.

But, exotic fabric yet unseen thrills me more.  I’m so excited!  I actually felt a spring in my step as I walked around after the text message exchange.  WooHoo!

Making fabric is a multi-step process involving many people, often in several countries.  Someone plants and harvests the crop, or raises and shears the sheep, or tends the worms. Someone spins the yarn.  Someone weaves the cloth.  Someone grows the dyestuff, mixes the dyes, applies the color, prepares it for distribution and markets it.  I usually don’t know any of those people.  But when I touch the fabric they have produced, I am connected to them.  Across miles and maybe oceans, we share something that helps me realize a comforting project for someone or a piece of art.

But to know that Kenny selected the fabric and brought it to me from a land far away will add a special link in the chain that somehow makes it stronger.  He mentioned scarves.  So I may get to wear it a while and cherish it that way, making memories with it before it becomes anything else.

Cyndi’s killer quilt

killer hexagonsToday at a community event where I was invited to share my quilting story, members of the group were invited to bring some of their family quilts as well.  Several did just that.  What fun to hear others’ quilt stories.

Cyndi brought a beautiful quilt pieced of hexagons.  Of course, the shape of the pieces got my interest immediately.  The arrangement of those hexagonal pieces was one I had not seen before, but the captivating feature of the quilt was its multigenerational story.

The quilt was begun sometime prior to 1917 by Alma, for her daughter Cleona.  Sixteen-year-old Cleona died that year at the age of 16, and  grief-stricken Alma stopped work on the project.  Alma herself died before ever getting back to work on the quilt.

Cleona’s aunt, Norma, took on the project at some point, but she, too, died before completing the work.

Years later, Norma’s daughter Cleona (niece to the first Cleona) married and asked her mother-in-law, Sarah, an accomplished quilter, to complete this piece of history.  Sarah refused, citing “that quilt has already killed three people!”

Determined, but out of connections to help, the younger Cleona took on the task herself.  Her husband built quilting frames for her and she began work.  When the master quilter Sarah saw the sub-standard stitches going into that gorgeous design, she gave in and completed the task.

Sarah lived to be 100 years old, so it seems the curse was broken.

Part of my talk emphasized labeling quilts, writing down the stories for future generations.  Cyndi had already done just that, complete with a genealogical chart to accompany the story.

Version 2Now I’m itching to grab some hexagons and assemble them in the pattern these women used.

Orphan Baskets and Bunnies

framed pearMany quilts are made in small units, or blocks, which are then assembled into a larger quilt top.  Most quiltmakers I know have an abundance of “orphan blocks”.  These can result when a project is abandoned, when extra blocks were made to test color combinations or size, or when the stitcher simply changed her mind about where the design was going.

I sometimes intentionally create orphan blocks.  I find hand stitching to be therapeutic and if I’m not in the midst of a big project, I love to explore single block designs.  Whether piecing or appliqué, I love playing and planning.  Many times, a big idea grows from a small block.

After I completed the appliqué for Indigo Pearadise, I continued to play with this motif in the smaller size.  A single pear fit comfortably in a 5” x 7” frame and makes a sweet little gift.

Early in my appliqué experience, I found that I could successfully stitch the running rabbit pictured in the design below.  To practice the appliqué stitch, to have handwork to do while visiting with my mother, and to explore the soft colors of Spring, I stitched many running rabbits.  Somewhere along the way, I began hearing the phrase “Baskets and Bunnies” in my mind and a theme emerged.  I found patterns for other bunnies, drew a simple basket with a rickrack handle, and kept sewing.

baskets & bunnies
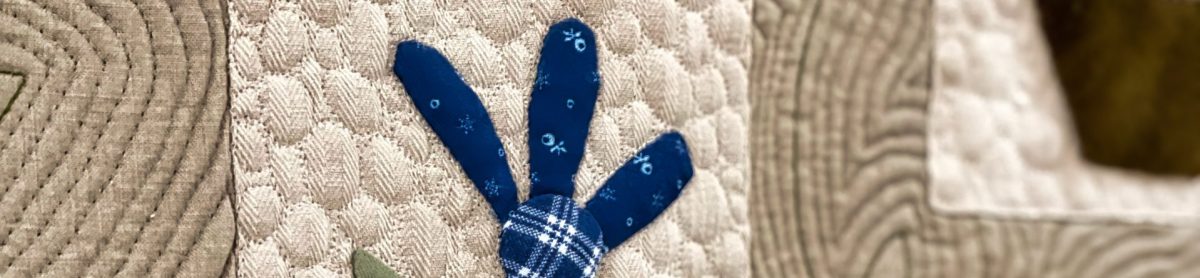
Some of these baskets and bunnies still reside in a basket awaiting their opportunity to shine.  The photo you see here is a quilt top that came about when my minigroup needed a quick project for a donation effort a few years ago.  The timing was Spring, my stitching sisters remembered my collection, and we got busy.  The completed top was quilted by a local longarm expert and we had a sweet little quilt in record time!

That little block with the rickrack handle has reappeared in reds and framed for Christmas gifts, too.  I don’t read many books twice, I don’t watch a lot of reruns on tv, but I do my share of repeating blocks I love.